15.11 A Programming Example
Let's develop a non-trivial GUI program to demonstrate the material presented in the previous lessons. We will develop a GUI Whack-a-mole game where a user tries to click on “moles” as they randomly pop up out of the “ground.”
This discussion will take you through an incremental development cycle that creates a program in well-defined stages. While you might read a finished computer program from “top to bottom,” that is not how it was developed. For a typical GUI program development, you are encouraged to go through these stages:
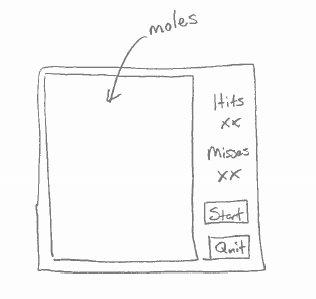
- Using scratch paper, physically draw a rough sketch of your user interface.
- Create the basic structure of your program and create the major frames that will hold the elements needed for your program's interface. Give the frames an initial size and color so that you can visually see them, given that there are no elements inside of them to determine their size.
- Incrementally add all of the elements you need for your program and size and position them appropriately.
- Create the event loop, defining actions for each event. Verify that the correct actions are executing for
each event. If using
Element.Widgetto access Tkinter features directly, Create your callback functions, stub them out, and assign them to appropriate events. Verify that the events are executing the correct functions. - Incrementally implement the functionality needed for each event (and/or callback function for Tkinter).
When you develop code using incremental development your program should always be executable. You continually add a few lines of code and then test them. If errors occur you almost always know were the errors came from! They came from the lines of code you just added.
15.11.1 A Whack-a-mole Game
Step 1: Make sure you have a reasonable GUI design and implementation plan before you start coding. Draw a sketch of your initial design on paper and consider how a user will interact with your program.
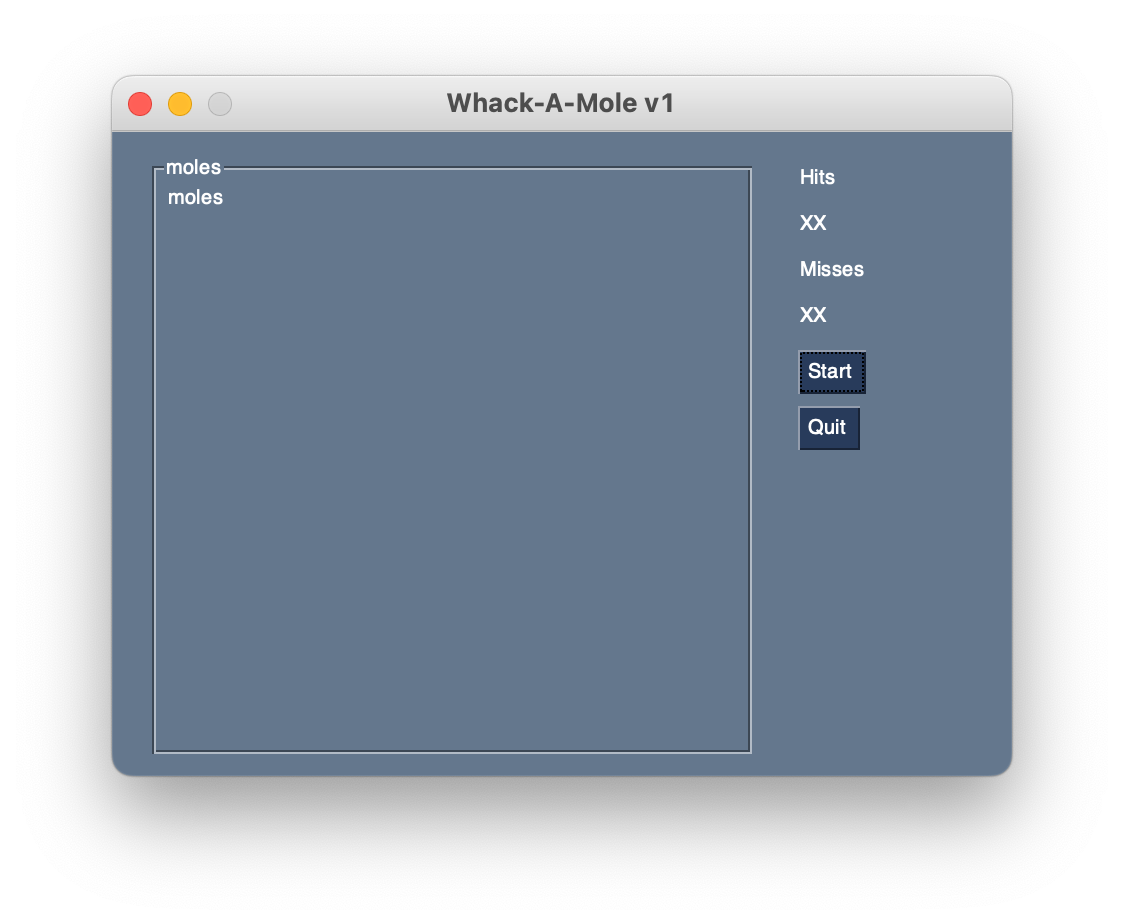
Step 2: Create the basic structure of your interface using appropriate container (frame, column, etc.) elements. You will need to give a size to the containers because they will contain no elements, which is how a container typically gets its size. It is also suggested that you give each frame a unique color so it is easy to see the area of the window it covers. Here is a basic start for our whack-a-mole game (whack_a_mole_v1.py):
import PySimpleGUI as sg


def main():
    col_r = [
        [sg.Text('Hits')],
        [sg.Text('XX')],
        [sg.Text('Misses')],
        [sg.Text('XX')],
        [sg.Button('Start')],
        [sg.Button('Quit')]
    ]
    layout = [
        [sg.Column([[sg.Frame('moles', [[sg.Text('moles')]], size=(300, 300))]]), sg.Column(col_r, size=(100, 300))]
    ]

    window = sg.Window('Whack-A-Mole v1', layout, use_ttk_buttons=True)
    event, values = window.read()


if __name__ == '__main__':
    main()
sg.Column elements were used for the left and right sides of the window. The left column just
contains a sg.Frame element. The right column layout is defined and assigned to
col_r, which is included in the right column element.
Here is the result. Note that a frame border was used, instead of colors to show the areas.
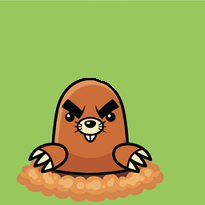
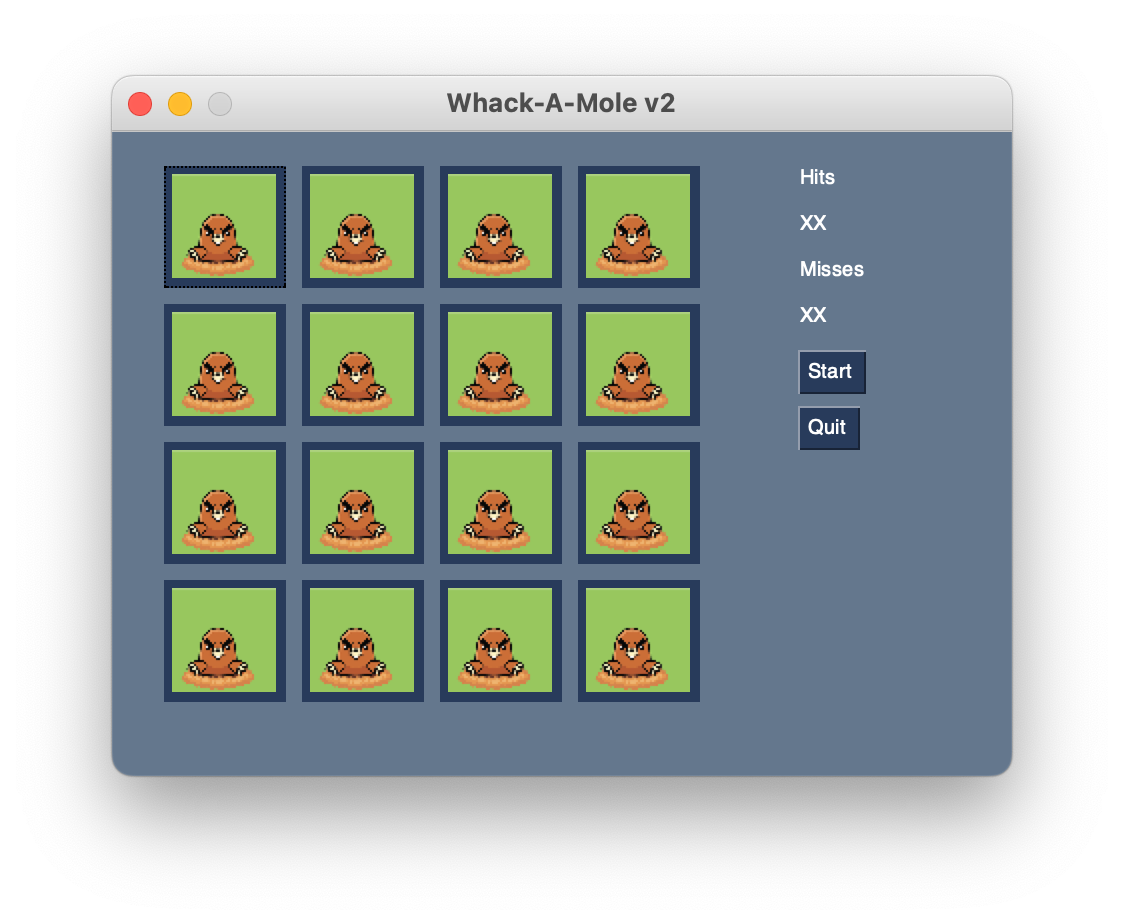
Step 3: Incrementally add appropriate elements to each frame. Don't attempt to add all the elements at once. The initial design conceptualized the moles as buttons, so a grid of buttons was added to the left frame, one button for each mole. The exact size of the “mole field” needs to be determined at a future time, so initialize a CONSTANT that can be used to easily change it later. (whack_a_mole_v2.py)
import PySimpleGUI as sg

MOLES_WIDTH = 300
MOLES_HEIGHT = 300
PAD_X = 4
PAD_Y = 4
NUM_MOLES_ACROSS = 4


def main():
    col_r = [
        [sg.Text('Hits')],
        [sg.Text('XX')],
        [sg.Text('Misses')],
        [sg.Text('XX')],
        [sg.Button('Start')],
        [sg.Button('Quit')]
    ]
    # moles = create_moles()
    layout = [
        [sg.Column([[sg.Frame('', create_moles(), size=(MOLES_WIDTH, MOLES_HEIGHT), relief=sg.RELIEF_FLAT)]]),
         sg.Column(col_r, size=(100, MOLES_HEIGHT))]
    ]

    window = sg.Window('Whack-A-Mole v2', layout, use_ttk_buttons=True)
    event, values = window.read()


def create_moles():
    mole_buttons = []
    btn_width = int(MOLES_WIDTH / NUM_MOLES_ACROSS - PAD_X * (NUM_MOLES_ACROSS + 1) / NUM_MOLES_ACROSS)
    btn_height = int(MOLES_HEIGHT / NUM_MOLES_ACROSS - PAD_Y * (NUM_MOLES_ACROSS + 1) / NUM_MOLES_ACROSS)
    subsample = int(MOLES_WIDTH / btn_width)

    for r in range(NUM_MOLES_ACROSS):
        row_of_buttons = []

        for c in range(NUM_MOLES_ACROSS):
            mole_button = sg.Button('', image_source='mole.png', target=(r, c), pad=(PAD_X, PAD_Y),
                                    image_size=(btn_width, btn_height), image_subsample=subsample)
            row_of_buttons.append(mole_button)

        mole_buttons.append(row_of_buttons)

    return mole_buttons


if __name__ == '__main__':
    main()
The create_moles() function was added to create all the mole buttons in the left column.
Here is the result of version 2.
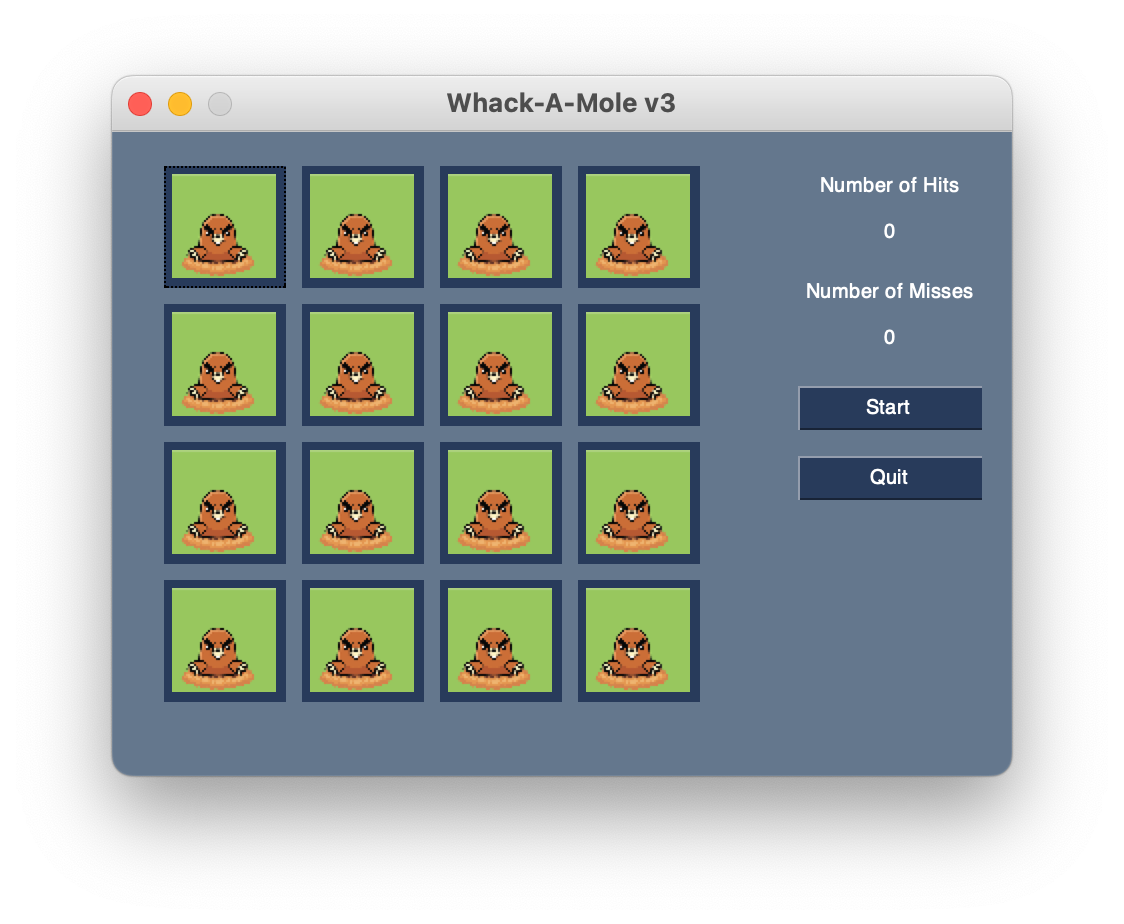
Continue to add appropriate elements for the right column. The final result is shown below, but recognize that it was developed little by little. (whack_a_mole_v3.py)
import PySimpleGUI as sg

MOLES_WIDTH = 300
MOLES_HEIGHT = 300
PAD_X = 4
PAD_Y = 4
NUM_MOLES_ACROSS = 4


def main():
    col_r = [
        [sg.VPush()],
        [sg.Text('Number of Hits', expand_x=True, expand_y=True, justification='center')],
        [sg.Text('0', key='-HITS-', expand_x=True, expand_y=True, justification='center')],
        [sg.VPush()],
        [sg.Text('Number of Misses', expand_x=True, expand_y=True, justification='center')],
        [sg.Text('0', key='-MISSES-', expand_x=True, expand_y=True, justification='center')],
        [sg.VPush()],
        [sg.Button('Start', expand_x=True, expand_y=True)],
        [sg.VPush()],
        [sg.Button('Quit', expand_x=True, expand_y=True)],
        [sg.VPush()],
    ]
    # moles = create_moles()
    layout = [
        [sg.Column([[sg.Frame('', create_moles(), size=(MOLES_WIDTH, MOLES_HEIGHT), relief=sg.RELIEF_FLAT)]]),
         sg.Column(col_r, size=(100, MOLES_HEIGHT), expand_y=True)]
    ]

    window = sg.Window('Whack-A-Mole v3', layout, use_ttk_buttons=True)
    event, values = window.read()


def create_moles():
    mole_buttons = []
    btn_width = int(MOLES_WIDTH / NUM_MOLES_ACROSS - PAD_X * (NUM_MOLES_ACROSS + 1) / NUM_MOLES_ACROSS)
    btn_height = int(MOLES_HEIGHT / NUM_MOLES_ACROSS - PAD_Y * (NUM_MOLES_ACROSS + 1) / NUM_MOLES_ACROSS)
    subsample = int(MOLES_WIDTH / btn_width)

    for r in range(NUM_MOLES_ACROSS):
        row_of_buttons = []

        for c in range(NUM_MOLES_ACROSS):
            mole_button = sg.Button('', image_source='mole.png', target=(r, c), pad=(PAD_X, PAD_Y),
                                    image_size=(btn_width, btn_height), image_subsample=subsample)
            row_of_buttons.append(mole_button)

        mole_buttons.append(row_of_buttons)

    return mole_buttons


if __name__ == '__main__':
    main()
Keys are added for Hits and Misses so their values can be updated.
Here is the result of version 3.
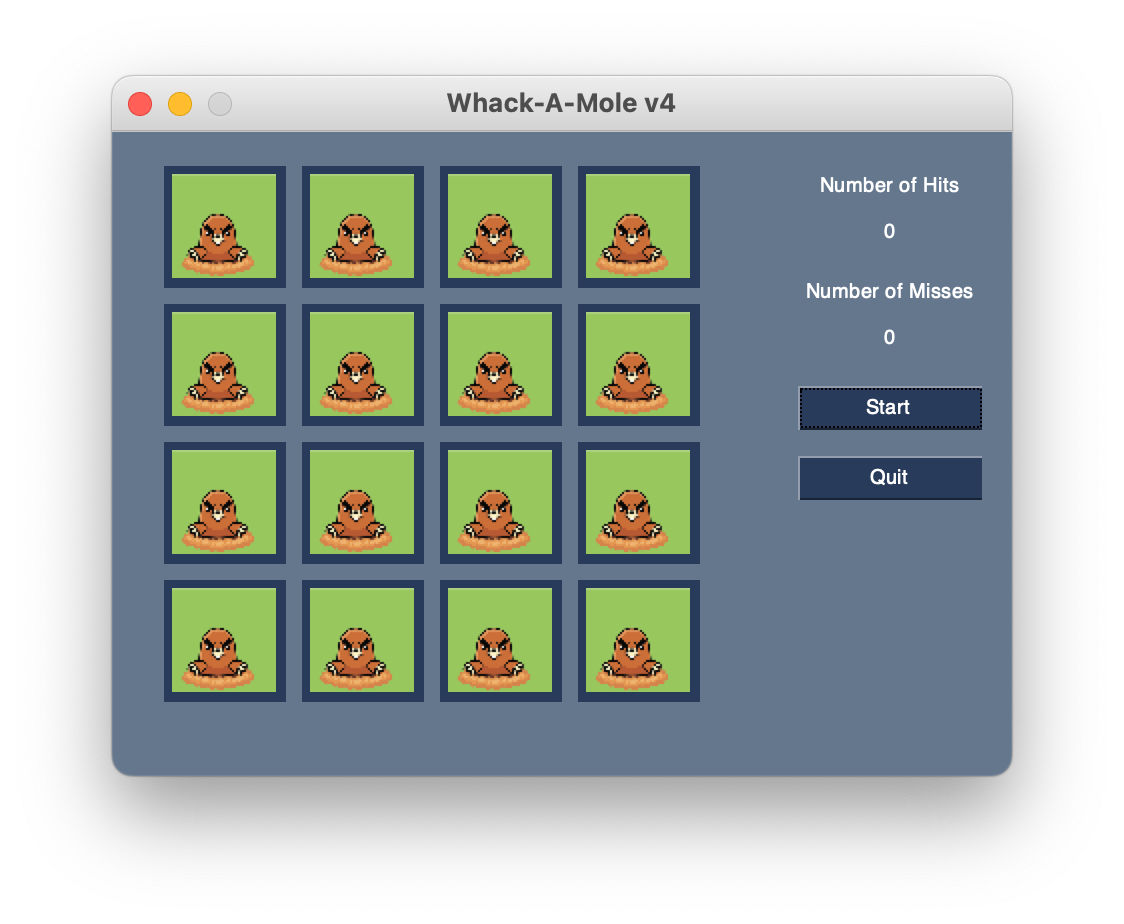
Step 4: Create an event loop with a condition for each event that will cause something to happen in your program. Stub these out with a single print statement in each one. Now test your program and make sure each event causes the correct print-line in the Python console. (whack_a_mole_v4.py)
import PySimpleGUI as sg

MOLES_WIDTH = 300
MOLES_HEIGHT = 300
PAD_X = 4
PAD_Y = 4
NUM_MOLES_ACROSS = 4


def main():
    col_r = [
        [sg.VPush()],
        [sg.Text('Number of Hits', expand_x=True, expand_y=True, justification='center')],
        [sg.Text('0', key='-HITS-', expand_x=True, expand_y=True, justification='center')],
        [sg.VPush()],
        [sg.Text('Number of Misses', expand_x=True, expand_y=True, justification='center')],
        [sg.Text('0', key='-MISSES-', expand_x=True, expand_y=True, justification='center')],
        [sg.VPush()],
        [sg.Button('Start', expand_x=True, expand_y=True)],
        [sg.VPush()],
        [sg.Button('Quit', expand_x=True, expand_y=True)],
        [sg.VPush()],
    ]
    # moles = create_moles()
    layout = [
        [sg.Column([[sg.Frame('', create_moles(), size=(MOLES_WIDTH, MOLES_HEIGHT), relief=sg.RELIEF_FLAT)]]),
         sg.Column(col_r, size=(100, MOLES_HEIGHT), expand_y=True)]
    ]

    window = sg.Window('Whack-A-Mole v4', layout, use_ttk_buttons=True)

    while True:
        event, values = window.read()

        if '-MOLE-' in event:
            print(f'mole button clicked: {window.find_element_with_focus().metadata}')
        elif event == 'Quit':
            print('quit button clicked')
            break
        elif event == 'Start':
            print('start button clicked')


def create_moles():
    mole_buttons = []
    btn_width = int(MOLES_WIDTH / NUM_MOLES_ACROSS - PAD_X * (NUM_MOLES_ACROSS + 1) / NUM_MOLES_ACROSS)
    btn_height = int(MOLES_HEIGHT / NUM_MOLES_ACROSS - PAD_Y * (NUM_MOLES_ACROSS + 1) / NUM_MOLES_ACROSS)
    subsample = int(MOLES_WIDTH / btn_width)

    for r in range(NUM_MOLES_ACROSS):
        row_of_buttons = []

        for c in range(NUM_MOLES_ACROSS):
            mole_button = sg.Button('', key=f'-MOLE-R:{padl(r, 2, dec=0, char="0")}C:{padl(c, 2, dec=0, char="0")}-',
                                    image_source='mole.png', target=(r, c), pad=(PAD_X, PAD_Y),
                                    image_size=(btn_width, btn_height), image_subsample=subsample,
                                    metadata={'row': r, 'col': c})
            row_of_buttons.append(mole_button)

        mole_buttons.append(row_of_buttons)

    return mole_buttons


def padl(val, width, dec=2, char=' '):
    if type(val) == int or type(val) == float:
        val = round(val, dec)
    val = str(val)
    if not dec == 0:
        dotLoc = val.index('.')
        if not dotLoc == len(val) - dec - 1:
            val = padr(val, len(val) + len(val) - dotLoc - 1, '0')
    return char * (width - len(val)) + val


def padr(val, width, char=' '):
    return val + char * (width - len(val))


if __name__ == '__main__':
    main()
Notice the addition of a couple of helper functions, padl() and padr() to help with
formatting of the keys for the mole buttons. Each mole button is created with a unique key.
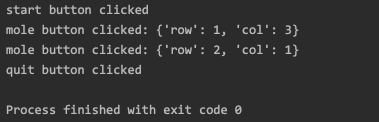
Here is the result of version 4. It looks better, but only the Quit button works at this time.
And the print results when clicking the buttons...
Step 5: Add appropriate functionality to the event loop conditionals. This is where the
functional logic of your particular application resides. In the case of our whack-a-mole game, we need to be
able to count the number of times a user clicks on a mole when it is visible. And we need the moles to appear
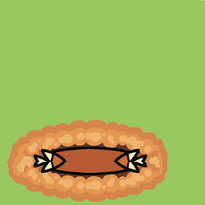
and disappear at random intervals. The border around each button was distracting, so the color was changed to
match the image background. By replacing the image used for each button, we can make the moles visible or
invisible. We can determine whether the mouse click is a “hit” or a “miss” by examining the metadata for the
button under the click to see if the mole is currently hiding. We use Tkinter timer events to change the image
on each label. These are made possible by using the PysimpleGUI Element.Widget() mechanism to
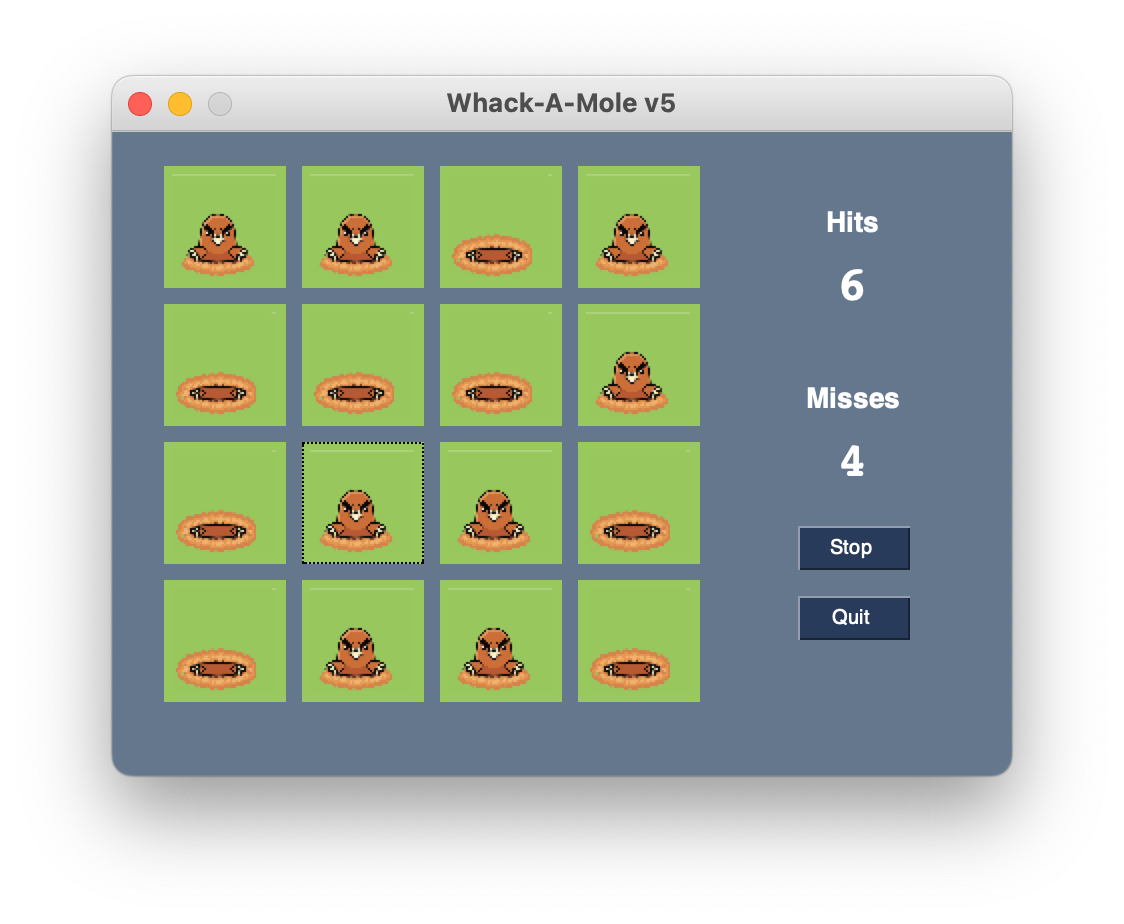
access the Tkinter objects directly. The end result is shown below. (whack_a_mole_v5.py)
import PySimpleGUI as sg
from random import randint

MOLES_WIDTH = 300
MOLES_HEIGHT = 300
PAD_X = 4
PAD_Y = 4
NUM_MOLES_ACROSS = 4
MIN_TIME_DOWN = 1000
MAX_TIME_DOWN = 5000
MIN_TIME_UP = 1000
MAX_TIME_UP = 3000
MOLE_COVER_IMAGE = 'mole_cover.png'
MOLE_IMAGE = 'mole.png'
HITS_COUNTER = 0
MISS_COUNTER = 0
BTN_WIDTH = int(MOLES_WIDTH / NUM_MOLES_ACROSS - PAD_X * (NUM_MOLES_ACROSS + 1) / NUM_MOLES_ACROSS)
BTN_HEIGHT = int(MOLES_HEIGHT / NUM_MOLES_ACROSS - PAD_Y * (NUM_MOLES_ACROSS + 1) / NUM_MOLES_ACROSS)
SUBSAMPLE = int(MOLES_WIDTH / BTN_WIDTH)
label_timers = {}
GAME_IS_RUNNING = False


def main():
    global MISS_COUNTER, HITS_COUNTER, GAME_IS_RUNNING
    global BTN_WIDTH, BTN_HEIGHT, SUBSAMPLE

    col_r = [
        [sg.VPush()],
        [sg.Text('\nHits', expand_x=True, expand_y=True, justification='center', font='Helvetica 14 bold')],
        [sg.Text(HITS_COUNTER, key='-HITS-', expand_x=True, expand_y=True, justification='center', font='Courier 24 bold')],
        [sg.VPush()],
        [sg.Text('\nMisses', expand_x=True, expand_y=True, justification='center', font='Helvetica 14 bold')],
        [sg.Text(MISS_COUNTER, key='-MISSES-', expand_x=True, expand_y=True, justification='center', font='Courier 24 bold')],
        [sg.VPush()],
        [sg.Button('Start', expand_x=True, expand_y=True)],
        [sg.VPush()],
        [sg.Button('Quit', expand_x=True, expand_y=True)],
        [sg.VPush()],
    ]
    # moles = create_moles()
    layout = [
        [sg.Column([[sg.Frame('', create_moles(), size=(MOLES_WIDTH, MOLES_HEIGHT), relief=sg.RELIEF_FLAT)]]),
         sg.Column(col_r, size=(100, MOLES_HEIGHT), expand_y=True)]
    ]

    window = sg.Window('Whack-A-Mole v5', layout, use_ttk_buttons=True, finalize=True, use_default_focus=False)

    GAME_IS_RUNNING = False

    while True:
        event, values = window.read()

        if '-MOLE-' in event:
            if GAME_IS_RUNNING:
                mole_button = window.find_element_with_focus()
                print(f'mole metadata: {mole_button.metadata}')
                print(f'mole ImageFilename: {mole_button.ImageFilename}')
                print(f'mole Target: {mole_button.Target}')
                print(f'mole hiding? {mole_button.metadata["hiding"]}')

                if window.find_element_with_focus().metadata['hiding']:
                    MISS_COUNTER += 1
                    window['-MISSES-'].update(MISS_COUNTER)
                else:
                    HITS_COUNTER += 1
                    window['-HITS-'].update(HITS_COUNTER)

        elif event == 'Quit':
            break
        elif event == 'Start':
            if not GAME_IS_RUNNING:
                window['Start'].update(text='Stop')

                for r in range(NUM_MOLES_ACROSS):
                    for c in range(NUM_MOLES_ACROSS):
                        window[mole_key(r, c)].\
                            update(image_filename=MOLE_COVER_IMAGE, image_size=(BTN_WIDTH, BTN_HEIGHT),
                                   image_subsample=SUBSAMPLE)
                        window[mole_key(r, c)].metadata['hiding'] = True
                        time_down = randint(MIN_TIME_DOWN, MAX_TIME_DOWN)
                        timer_object = window[mole_key(r, c)].Widget.after(time_down, pop_up_mole, window[mole_key(r, c)])
                        label_timers[id(window[mole_key(r, c)])] = timer_object

                GAME_IS_RUNNING = True
                HITS_COUNTER = 0
                window['-HITS-'].update(HITS_COUNTER)
                MISS_COUNTER = 0
                window['-MISSES-'].update(MISS_COUNTER)

            else:
                window['Start'].update(text='Start')

                for r in range(NUM_MOLES_ACROSS):
                    for c in range(NUM_MOLES_ACROSS):
                        window[mole_key(r, c)].\
                            update(image_filename=MOLE_IMAGE, image_size=(BTN_WIDTH, BTN_HEIGHT),
                                   image_subsample=SUBSAMPLE)
                        window[mole_key(r, c)].metadata['hiding'] = False
                        window[mole_key(r, c)].Widget.after_cancel(label_timers[id(window[mole_key(r, c)])])

                GAME_IS_RUNNING = False


def create_moles():
    global BTN_WIDTH, BTN_HEIGHT, SUBSAMPLE
    mole_buttons = []

    for r in range(NUM_MOLES_ACROSS):
        row_of_buttons = []

        for c in range(NUM_MOLES_ACROSS):
            mole_button = sg.Button('', key=mole_key(r, c), image_source=MOLE_IMAGE, target=(r, c),
                                    pad=(PAD_X, PAD_Y), image_size=(BTN_WIDTH, BTN_HEIGHT),
                                    image_subsample=SUBSAMPLE, metadata={'hiding': False}, border_width=0,
                                    button_color=('#98c85e', '#98c85e'), highlight_colors=('#98c85e', '#98c85e'))
            row_of_buttons.append(mole_button)

        mole_buttons.append(row_of_buttons)

    return mole_buttons


def mole_key(r, c):
    return f'-MOLE-R:{padl(r, 2, dec=0, char="0")}C:{padl(c, 2, dec=0, char="0")}-'


def put_down_mole(the_button, timer_expired):
    if GAME_IS_RUNNING:
        if timer_expired:
            # increment MISSES
            pass
        else:
            the_button.Widget.after_cancel(label_timers[id(the_button)])

        the_button.update(image_filename=MOLE_COVER_IMAGE, image_size=(BTN_WIDTH, BTN_HEIGHT), image_subsample=SUBSAMPLE)
        the_button.metadata['hiding'] = True
        time_down = randint(MIN_TIME_DOWN, MAX_TIME_DOWN)
        timer_object = the_button.Widget.after(time_down, pop_up_mole, the_button)
        label_timers[id(the_button)] = timer_object


def pop_up_mole(the_button):
    global GAME_IS_RUNNING

    the_button.update(image_filename=MOLE_IMAGE, image_size=(BTN_WIDTH, BTN_HEIGHT), image_subsample=SUBSAMPLE)
    the_button.metadata['hiding'] = False

    if GAME_IS_RUNNING:
        time_up = randint(MIN_TIME_UP, MAX_TIME_UP)
        timer_object = the_button.Widget.after(time_up, put_down_mole, the_button, True)
        label_timers[id(the_button)] = timer_object


def padl(val, width, dec=2, char=' '):
    if type(val) == int or type(val) == float:
        val = round(val, dec)
    val = str(val)
    if not dec == 0:
        dotLoc = val.index('.')
        if not dotLoc == len(val) - dec - 1:
            val = padr(val, len(val) + len(val) - dotLoc - 1, '0')
    return char * (width - len(val)) + val


def padr(val, width, char=' '):
    return val + char * (width - len(val))


if __name__ == '__main__':
    main()
And, here is the result, mid-game.
15.11.2 Summary
We developed a complete GUI application in 5 well-designed stages. Hopefully, you see the value in incremental software development.
However, the end result is not necessarily easy to understand or modify for future enhancements. The next lesson will introduce a scheme for breaking complete software into more manageable pieces.